
How to create an Emulator in Android Studio?
The Android Emulator simulates Android devices on your computer so that you can test your application on a variety of devices and Android API levels without needing to have each physical device.
The emulator provides almost all of the capabilities of a real Android device. You can simulate incoming phone calls and text messages, specify the location of the device, simulate different network speeds, simulate rotation and other hardware sensors, access the Google Play Store, and much more.
Testing your app on the emulator is in some ways faster and easier than doing so on a physical device. For example, you can transfer data faster to the emulator than to a device connected over USB. The emulator comes with predefined configurations for various Android Phones, Tablets, Wear OS, and Android TV devices.
Note :- Emulators may slow down your computer system so make sure you have minimum system requirements (like 8 GB ram, A good processor etc.
Follow below steps to Setup an Emulator :
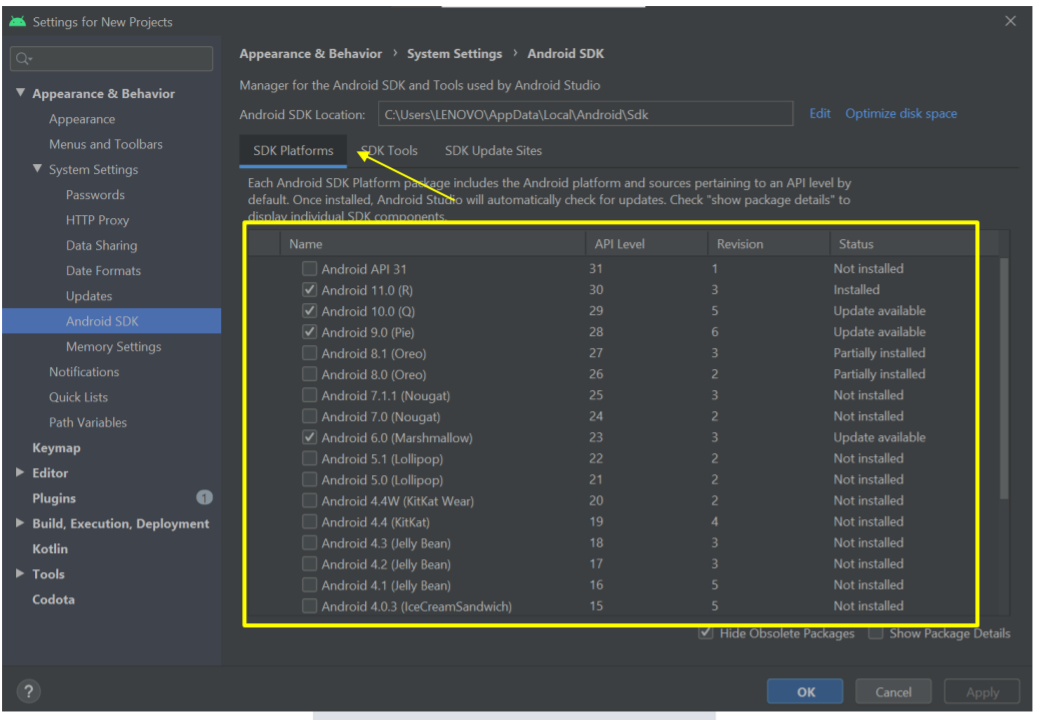
Step 1. At first, you need to install some required components to run an emulator from the SDK tool. Click on the SDK Tools icon on the top right corner. see below image

Step 2. Install at least one SDK Platform (Latest Version Recommended)
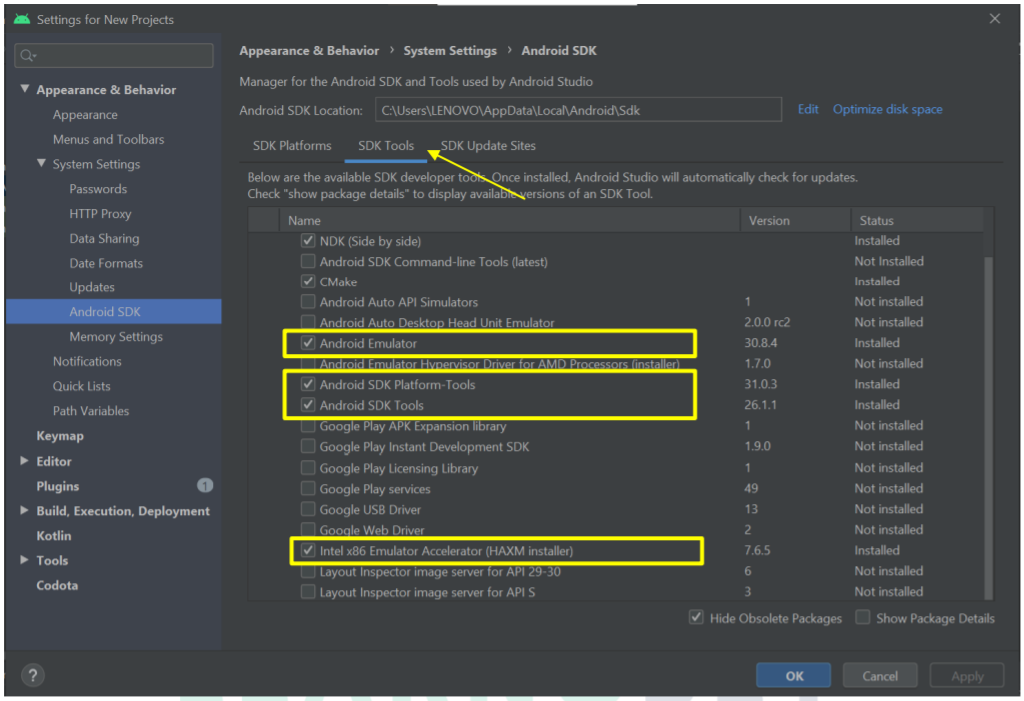
Step 3. After successfully installed a SDK Platform. Open SDK tool option and then install highlighted options (Android Emulator, Android SDK Platform Tools, Android SDK Tools, Intel x86 Emulator Accelerator (HAXM installer).
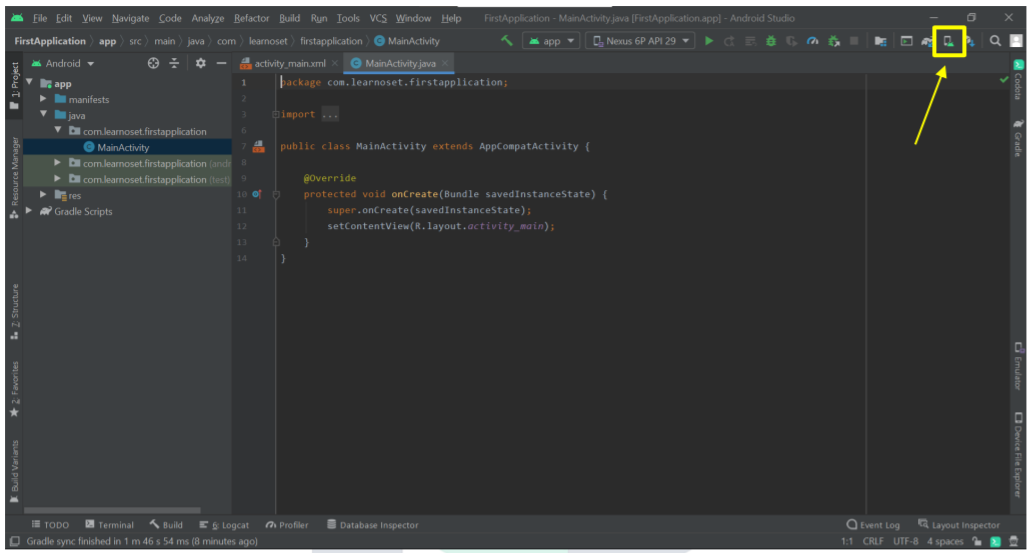
Step 4. After successfully installing all the required tools to run an emulator so now choose ‘AVD Manager’ option. see below image.
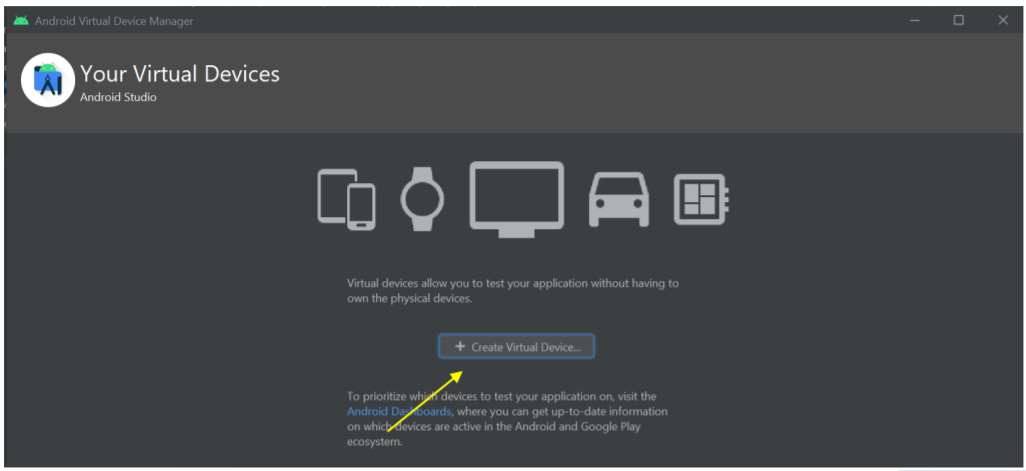
Step 5. Click on ‘Create Virtual Device’ button.
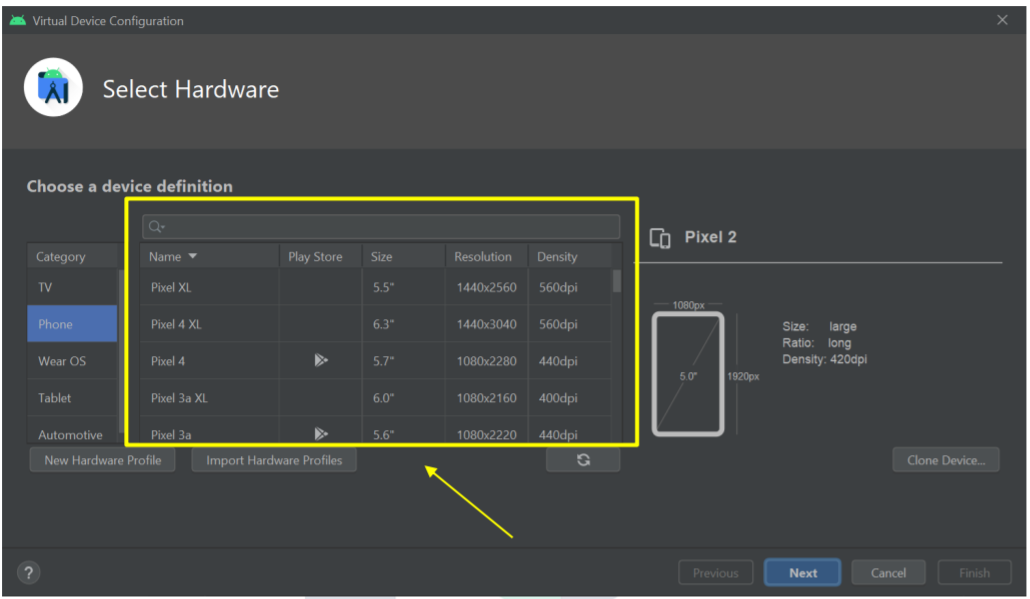
Step 6. Choose device resolution according to your need and then click on ‘Next’ button.
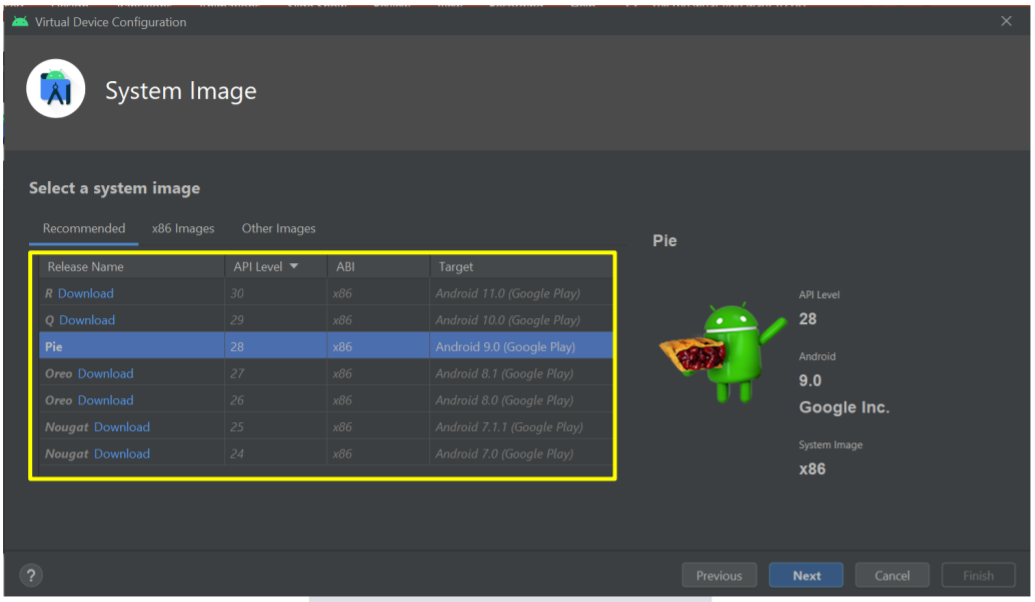
Step 7. Now select Android / Platform Tool version and then click on ‘Next’ button. If you haven’t download any Platform Tool yet then you have to download it first (see Step 2).
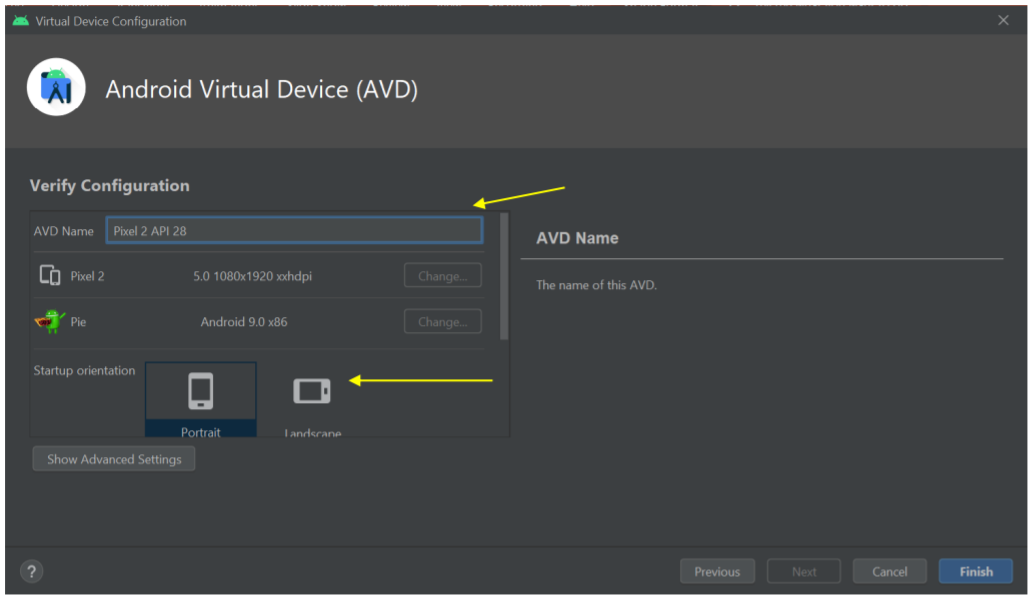
Step 8. Here, you can give a name to your emulator or you can also change its default orientation. This orientation can be changed later while emulator is running. Click on ‘Finish’ button to create an emulator.
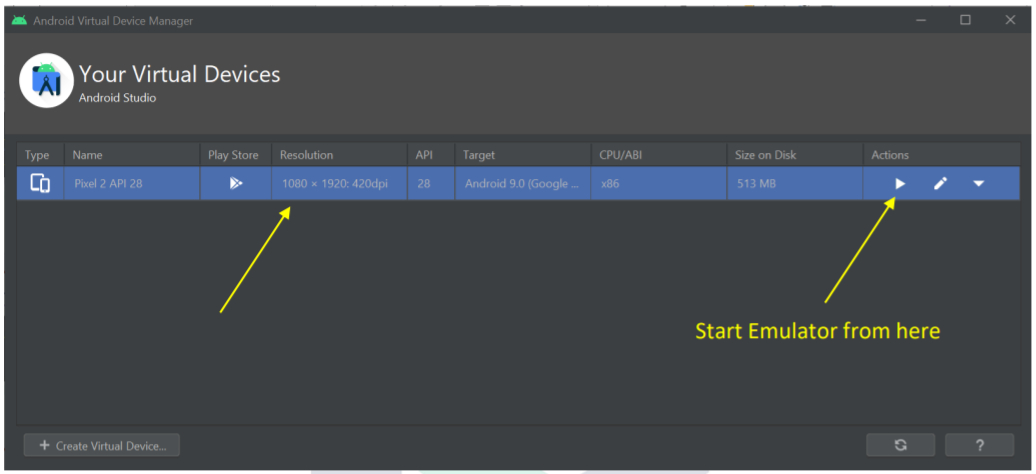
Step 9. As you can see our new created emulator is showing here. You can start the emulator from that play button appear in ‘Actions’ option.
If you have any Questions or Queries
You can mail us at info.learnoset@gmail.com
Follow us to learn Coding and get in touch with new Technologies.